Creating custom disk images
We know full-system simulation requires a disk image, so how do we make our own?
By the end of this section, you will be able to:
- Use disk image resources in gem5 simulations.
- Explain how disk images are created for use in gem5 simulations.
- Modify and build a base disk image to specialize it for research needs.
What’s a disk image?
A disk image is an exact saved snapshot of a disk’s contents (including, crucially, operating system files). Disk images are used for a variety of purposes, but here we are interested in using them for simulation. We need to provide a disk image when we simulate in full-system mode, since FS mode simulates the entire system, including the disk.
So far, we’ve used existing disk image resources from gem5 resources when simulating in FS mode.

You may remember that in the simulation modes lesson, we obtained the
arm-ubuntu-24.04-imgdisk image resource and passed it toset_kernel_disk_workload()(alongside a kernel and bootloader) to run an FS mode simulation.
This lesson is all about making your own disk images. You may want to do this to make an image with specific benchmarks installed to fit your simulation needs.
Creating a disk image
We can build a custom disk image by setting up a blank disk image, installing all of the dependencies we want on it, then saving that disk image. We can use QEMU, which has a disk image creation utility (documentation) to do this. To make our job easier, we’ll also use Packer, a tool for automating the process of building machine images, instead of interfacing with QEMU directly.
In the workspace directory for this lesson, you’ll find x86-ubuntu, a directory containing the files used to create the x86-ubuntu-24.04 gem5 disk image resource. We’ll take a look at how that disk image is created, then we’ll extend it to add a benchmark.
This image is built using Ubuntu autoinstall to install Ubuntu. This is a “hands off” installation format that allows you configure everything ahead of installation then just let the installation process run.
Installing QEMU
QEMU installation instructions can be found here.
TL;DR, you should run:
sudo apt-get install qemu
You can double-check that everything is installed as expected by running:
qemu-system-x86_64 --version
You should see something that looks like this:
QEMU emulator version 11.1.2
Copyright (c) 2003-2026 Fabrice Bellard and the QEMU Project developers
Let’s look at build.sh
In the top level of the x86-ubuntu directory, build.sh is the script being used to build the disk image. Let’s break down what happens here.
Installing Packer
The first portion of the script checks for the Packer binary in the directory, and downloads it if not found:
if [ ! -f ./packer ]; then
    wget https://releases.hashicorp.com/packer/${PACKER_VERSION}/packer_${PACKER_VERSION}_linux_amd64.zip;
    unzip packer_${PACKER_VERSION}_linux_amd64.zip;
    rm packer_${PACKER_VERSION}_linux_amd64.zip;
fi
If this fails for any reason, you can download the Packer binary yourself here.
Configuration file
Next, build.sh looks for a configuration file provided as a command-line argument. If this file is found, it uses the script to install plugins and build a disk image using this file:
...
if [ -f "$config_file" ]; then
    # Install the needed plugins
    ./packer init "$config_file"
    # Build the image
    ./packer build "$config_file"
...
This configuration file is a .pkr.hcl file that describes the parameters of the disk image to build. The x86-ubuntu.pkr.hcl file is provided; let’s investigate this file!
The Packer script
The Packer script is divided into several sections; we’ll focus on the important ones.
QEMU options
source "qemu" "initialize" {
  ...
  boot_command     = ["e<wait>",
                      "<down><down><down>",
                      "<end><bs><bs><bs><bs><wait>",
                      "autoinstall  ds=nocloud-net\\;s=http://:/ ---<wait>",
                      "<f10><wait>"
                    ]
  ...
  iso_checksum     = "sha256:5e38b55d57d94ff029719342357325ed3bda38fa80054f9330dc789cd2d43931"
  iso_urls         = ["https://old-releases.ubuntu.com/releases/jammy/ubuntu-22.04.2-live-server-amd64.iso"]
  ...
  qemuargs         = [["-cpu", "host"], ["-display", "none"]]
  ...
This block specifies options for QEMU. The most important thing to look for here is boot_command, which will open the GRUB menu and edit the boot command to add the autoinstall command.
You will also see options pertaining to the ISO (a type of disk image) for the version of Ubuntu we want to use. iso_urls passes a link to the ISO, and iso_checksum provides its checksum to check against.
Lastly, note qemu-args. This provides the arguments for the QEMU command to be run. In this case, we tell QEMU to run with the host CPU and to not use a display.
This script uses KVM for acceleration. If your environment does not allow you to use KVM, you should modify a few lines in this block:
- Remove the
accelerator=kvmline,- Remove the
["-cpu", "host"]option fromqemuargs.
If your QEMU installation is not located at
/usr/bin/qemu-system-x86_64, you should update theqemu_binaryline to point to your installation. You can find this path using:which qemu-system-x86_64
File provisioners
After the QEMU options, you’ll see several blocks with this format:
provisioner "file" {
    destination = <...>
    source      = <...>
}
These provisioners allow us to copy files from the host machine (your machine) to the disk image. We copy over a few scripts we want to be run after Ubuntu is installed.
Shell provisioner
Finally, you can see a single shell provisioner:
provisioner "shell" {
    execute_command = "echo '${var.ssh_password}' |  sudo -E -S bash ''"
    scripts         = ["scripts/post-installation.sh"]
  }
This provisioner allows us to run a bash script (post-installation.sh) after Ubuntu is installed. This script downloads a few useful packages and libraries (including gem5-bridge), then builds those libraries.
Detour: Getting a user-data file
As previously mentioned, this Packer script uses Ubuntu autoinstall. To use Ubuntu autoinstall, we need a user-data file. This file specifies the configuration for installing Ubuntu. For the sake of this example, this file is already provided; if you’re curious about how to get this file yourself, expand the tooltip below.
How to use QEMU to get a user-data file
Any time a system is installed using the Ubuntu installer, the user-data file is automatically created.
If you have Ubuntu installed on a machine, you can fetch this file (called
autoinstall-user-data) from/var/log/installer/autoinstall-user-dataafter the system’s first reboot.
We can take advantage of this here by using QEMU to install Ubuntu and grab this file. First, we create an empty disk image and install Ubuntu on it:
qemu-img create -f raw ubuntu-22.04.2.raw 5G
You’ll notice this image is 5GB in size.
You should now have two files in your working directory: the .iso file we got in Step 1 and the .raw file we just created.
Now that we have a disk image, let’s boot it:
qemu-system-x86_64 -m 2G \
      -cdrom ubuntu-22.04.2-live-server-amd64.iso \
      -boot d -drive file=ubuntu-22.04.2.raw,format=raw \
      -net nic \
      -net user,hostfwd=tcp::2222-:22
This will launch a QEMU window:
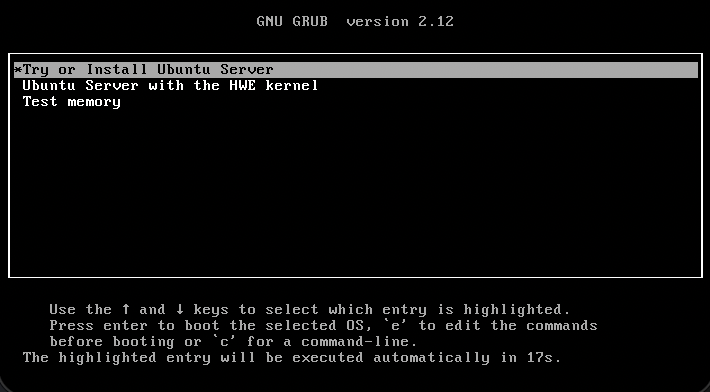
Go through the steps of installing Ubuntu. You can then grab the autoinstall-user-data file!
If you’d like, you can now run ./build.sh x86-ubuntu-24-04.pkr.hcl to see the process of building this basic disk image. If not, you can download the finished image from gem5 resources.
Be warned that this will take a while, especially if not using KVM!
We’ll now be adding a benchmark to this disk image using Packer.
Extending a disk image
Let’s say we want to run the GABPS benchmark suite in a full-system simulation, meaning we need to add these benchmarks to our disk image. We can use a similar-looking Packer script to the one we used to create the disk image to do this!
Packer script
We’ll be modifying the x86-ubuntu.pkr.hcl file. The first thing we need to do is tell this script that we’re no longer installing Ubuntu from an ISO; rather, we’re working from a base disk image. To do this, we add this line to the QEMU options block:
disk_image = true
Since we’re no longer installing from an ISO, we can also remove the http directory, which contains the user-data file:
http_directory = "http" # DELETE this line!
We should also change iso_urls and iso_checksum to point to our base image. We change iso_urls to the absolute path to the disk image:
iso_urls = ["<path_to_workspace>/05-advanced-topics/05-disk-images/x86-ubuntu/x86-ubuntu-24.04-20250515.gz"]
We can get the checksum for this new disk image using:
sha256sum ./x86-ubuntu-24-04.gz
Then, we can update iso_checksum:
iso_checksum = "sha256:<new checksum>"
Since all of the files listed in the provisioners on this script are already on our disk image, we don’t need to copy them again. Therefore, we can remove all file provisioners, too.
Lastly, we need to change our boot command! Our old command was for using installing Ubuntu, and we aren’t doing that anymore. Instead, we’ll ssh into QEMU and re-enable the network:
boot_command = ["<wait180>",
                "gem5<enter><wait>",
                "12345<enter><wait>",
                "sudo mv /etc/netplan/50-cloud-init.yaml.bak /etc/netplan/50-cloud-init.yaml<enter><wait>",
                "12345<enter><wait>",
                "sudo netplan apply<enter><wait>",
                "<wait>"
]
Post-installation
Our new Packer script is now ready to go! The last thing we need to do is modify our post-installation script to clone and make the GAPBS repository. Replace the contents of scripts/post-installation.sh with:
git clone https://github.com/sbeamer/gapbs
cd gapbs
make
…and with that, we can run build.sh!
./build.sh x86-ubuntu-24.04.pkr.hcl
This will take a bit, but not nearly as long as it takes to build the original image.
Once the script wraps up, you should have a new directory within x86-ubuntu containing our new disk image!
Using our custom disk image
Now that we have our custom disk image, we can use it in our gem5 simulations as a local resource. Since this section is not about creating local gem5 resources, the .json file for our new disk image resource has already been created for you! All you need to add to this file is the absolute path to your newly-created disk image and provide the correct md5sum.
Fill out the path after file:/:
"url": "file:/<ABSOLUTE_PATH_TO_DISK_IMAGE>",
Get the md5sum by running:
md5sum x86-ubuntu-24-04
…then add it to the .json:
"md5sum": "<MD5SUM>",
The configuration script
Let’s take a look at the configuration script. It sets up an X86Board with a MESI cache hierarchy and obtains our local resource using its id, x86-ubuntu-with-gapbs-img:
disk_image = obtain_resource("x86-ubuntu-with-gapbs-img")
It then uses set_kernel_disk_workload() to set the board’s workload. Remember that a disk image is not enough to run a full-system workload; this function requires a disk image, a kernel, and (on ARM) a bootloader. Thankfully, we’re using x86, and we can grab the kernel relatively easily:
board.set_kernel_disk_workload (
    kernel = obtain_resource("x86-linux-kernel-6.8.0-52-generic"),
    kernel_args = [
            "earlyprintk=ttyS0",
            "console=ttyS0",
            "lpj=7999923",
            "root=/dev/sda2"
        ],
    disk_image = disk_image,
    readfile_contents = "./gapbs/bfs -g 10 -n 10"
)
These are the same kernel and kernel arguments used in
x86-ubuntu-24.04-boot-with-systemd.
You’ll also notice the last argument, readfile_contents. This allows us to start the GAPBS BFS benchmark automatically.
We’re ready to run! Remember that since we’re using a local resource, we need to append our .json file to the command:
GEM5_RESOURCE_JSON_APPEND=./local-gapbs-resource.json gem5 x86-fs-gapbs-run.py
Full-system simulations take a while, even when using an
ATOMICCPU like we are here. If KVM fast-forwarding is available to you, you may want to use it here!
Congratulations! You created and used a custom disk image in a gem5 simulation. This same process can be used to add whichever benchmarks you may need for your simulations.