MultiSim
We’ve talked a lot about how to make individual simulations run faster; what about running multiple simulations at the same time?
By the end of this section, you will be able to:
- Use a MultiSim config file to run multiple simulations in parallel.
- Explain why using MultiSim to create parallel instances of gem5 simulations is preferable over multiprocessing via script.
gem5 is single-threaded
You might wonder whether you can use multiple cores and threads to speed up gem5 simulations. Unfortunately, gem5 is single-threaded by design. This is unlikely to change, as it would involve overhauling the entire codebase. This means that a single simulation cannot be sped up with parallelism.
It’s not all bad news, though! As you may have noticed throughout this bootcamp, simulators like gem5 are used for experimentation. This means that you’ll almost always want to run multiple simulation trials, modifying different variables and keeping others constant. You can run these separate simulations in parallel!
We can’t run a single, multi-threaded process, but we can run many single-threaded processes.
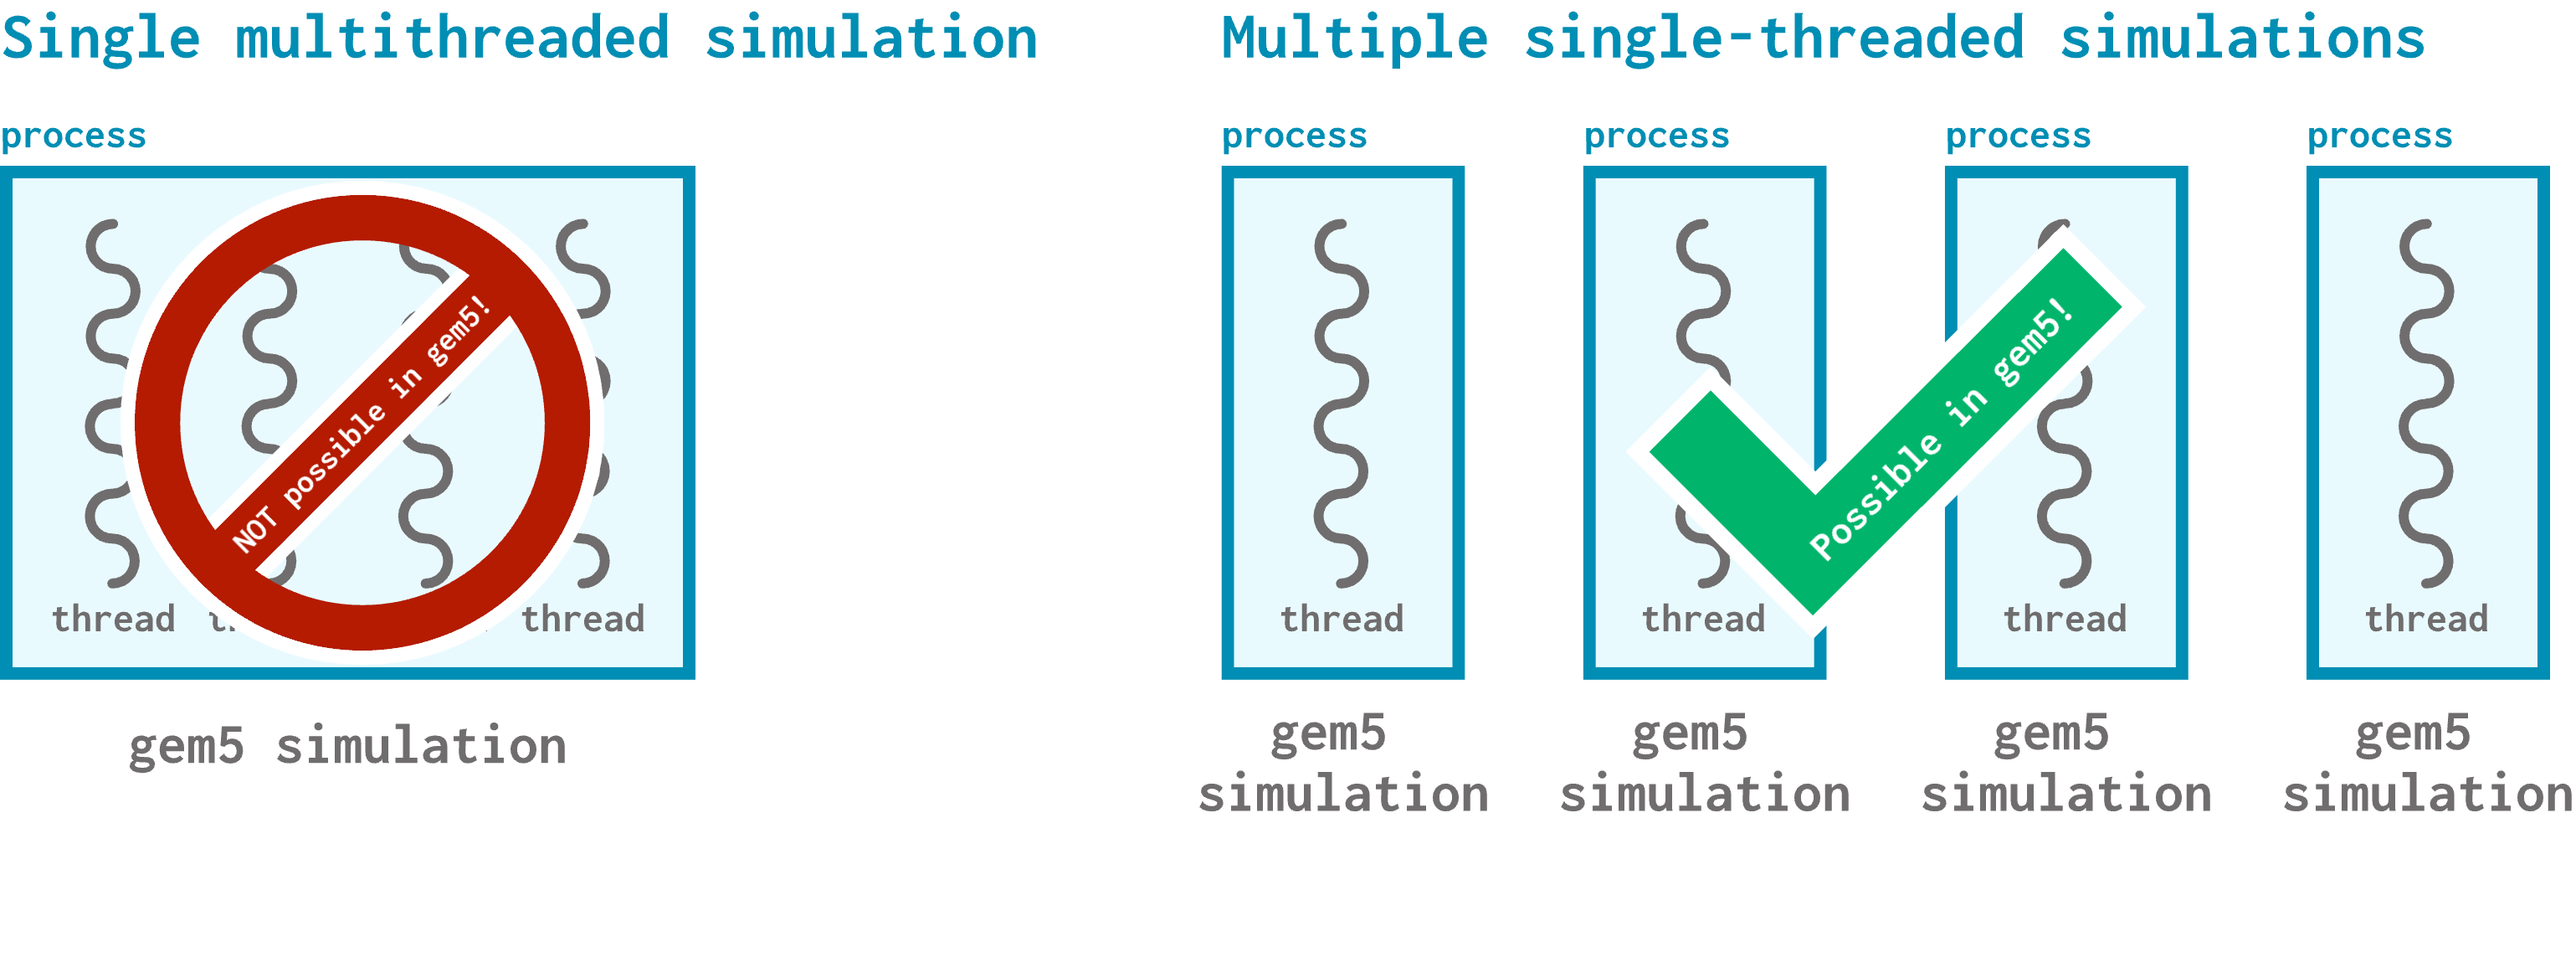
It turns out that this single-threaded approach simplifies the implementation of gem5 quite a bit, since it means gem5 doesn’t have to deal with multithreading issues like memory consistency.
Let there be scripts
The original way that gem5 users found to automate creating and running multiple gem5 simulations in parallel was using scripts.
If you read through the SimPoint example in the sampled simulation section, you’ve seen one of these scripts! We used a script (
run_all_simpoint.sh) to run all of our SimPoint checkpoints simultaneously.
A typical bash script for parallel simulation looks something like this:
gem5 -re -d experiment_1 experiment.py "8kB" "8kB" & \
gem5 -re -d experiment_2 experiment.py "16kB" "8kB" & \
gem5 -re -d experiment_3 experiment.py "8kB" "16kB" & \
gem5 -re -d experiment_4 experiment.py "16kB" "16kB"
We start all 4 of our experiments in the background and direct them to different output directories so that they don’t overwrite each other’s output.
As a reminder,
-reredirectsstdoutandstderrto their own files in the output directory.-dspecifies an output directory name.
This is a very common approach (especially since no alternatives were supported by gem5 until somewhat recently), and it’s pretty straightforward to get off the ground. However, it has a few major downsides. First, each user who wants to run parallel simulations has to write a script like this every time. This increases the barrier to entry (what if you’re not familiar with scripting?), makes errors more likely, and requires you to manage all of the output files. Second, these scripts are non-standard; everyone has a different way of writing them. This makes it difficult to share your scripts with others or reproduce results. Finally, gem5 has no built-in support for scripts like these, nor does it plan to have support.
There’s a better way
While gem5 has no plans to support scripts for parallelism, it supports MultiSim! MultiSim is a gem5 feature that allows you to run multiple gem5 processes from a single configuration script. It takes advantage of Python’s multiprocessing module to let a single gem5 process queue up multiple simulations for execution.
MultiSim works by using a parent process (this is the process that you create by running a gem5 executable) to create child processes that each run a simulation. We call these simulations “jobs” and call the child processes who execute them “workers”.
MultiSim configuration scripts
A MultiSim configuration script looks very similar to a standard gem5 configuration script. Let’s prove it by converting a standard script into a MultiSim script. Open multisim_experiment.py to get started.
What is this script?
The script in multisim_experiment.py currently sets up (but doesn’t simulate) a simple system with a private L1 cache hierarchy. The parameters of interest for this simulation are the sizes of the L1 instruction and data caches; this script makes them both 8kB, but we want to see what happens if one or both of them are 16kB. We’ll be using MultiSim to do this!
To start, let’s import MultiSim. Add the following line to the top of the script:
import gem5.utils.multisim as multisim
Setting a process maximum
The first thing we should make sure we do it set a process maximum for MultiSim to use. If we don’t do this, the script will still run, but it will attempt to consume all available threads on your system. Assuming your system has a couple of other things going on, we want to restrict gem5 to a set number of processes.
We can use the set_num_processes() function to to appropriately restrict MultiSim:
multisim.set_num_processes(2)
Defining multiple simulations
We can define multiple simulations by creating multiple Simulator objects, one for each simulation. Let’s do this in the simplest way possible using a nested for loop.
As a reminder, the parameters we want to explore in this experiment are:
- L1 d-cache: 8kB, 16kB
- L1 i-cache: 8kB, 16kB
We need a total of 4 simulations to explore all combinations of these parameters. Let’s take all of the code we currently have and wrap it in this nested for loop:
for data_cache_size in ["8KiB","16KiB"]:
    for instruction_cache_size in ["8KiB","16KiB"]:
        cache_hierarchy = PrivateL1CacheHierarchy(
            l1d_size=data_cache_size,
            l1i_size=instruction_cache_size,
        )

        memory = ...
You’ll notice that this code stops after setting the board’s workload. We still need to create a Simulator inside the for loop for each parameter combination:
simulator = Simulator(
  board=board,
  id=f"process_{data_cache_size}_{instruction_cache_size}"
)
We give each simulator a unique ID using Simulator’s id parameter so that we can tell apart our simulations once we run them all together.
Adding simulations to MultiSim
We now have four simulators but no way to run their simulations. To do that, each simulator needs to be added to MultiSim!
Still inside the for loop, add the simulator object you just created to MultiSim using:
multisim.add_simulator(simulator)
And that’s it! Alarm bells might be going off in your head, though: didn’t we forget to actually invoke the run() function (or the MultiSim equivalent)? As it turns out, the multisim module’s execution will run the simulations for us, no extra function calls required.
Running concurrently
If we want to run all 4 simulations, we can do that using the following command:
gem5 -m gem5.utils.multisim multisim_experiment.py
You’ll notice our use of the -m flag to pass in the multisim module. Other than that, we just pass in the name of the configuration script like any other simulation.
As the simulations run, you’ll notice a lot of terminal output–this is because all four simulations’ stdouts are directed to the console (you can always use -re to direct them to files instead). Once this is done running, you can check m5out to see a separate output folder for each of our 4 simulations!
m5out
    |____ process_8KiB_8KiB
    |____ process_8KiB_16KiB
    |____ process_16KiB_8KiB
    |____ process_16KiB_16KiB
    |____ stats.txt
Each folder is named with the id we gave each simulator in the configuration script.
You’ll notice that some of our regular files like config.ini and config.json are missing, and that stats.txt is empty! Have no fear: each simulation folder has its own copy of these files specifying its simulated system and statistics. Let’s take a look at the L1 cache miss rates for each simulation. From the m5out directory, run:
grep -r 'overallMissRate::total'
to get:
process_16KiB_8KiB/stats.txt:board.cache_hierarchy.l1dcaches.overallMissRate::total     0.004125
process_16KiB_8KiB/stats.txt:board.cache_hierarchy.l1icaches.overallMissRate::total     0.000017
process_8KiB_16KiB/stats.txt:board.cache_hierarchy.l1dcaches.overallMissRate::total     0.008193
process_8KiB_16KiB/stats.txt:board.cache_hierarchy.l1icaches.overallMissRate::total     0.000015
process_16KiB_16KiB/stats.txt:board.cache_hierarchy.l1dcaches.overallMissRate::total     0.004125
process_16KiB_16KiB/stats.txt:board.cache_hierarchy.l1icaches.overallMissRate::total     0.000015
process_8KiB_8KiB/stats.txt:board.cache_hierarchy.l1dcaches.overallMissRate::total     0.008193
process_8KiB_8KiB/stats.txt:board.cache_hierarchy.l1icaches.overallMissRate::total     0.000017
Putting this in a slightly nicer format, here are out results:
| Simulation | L1d Miss Rate | L1i Miss Rate |
|---|---|---|
| 8KiB_8KiB | 0.008193 | 0.000017 |
| 8KiB_16KiB | 0.008193 | 0.000015 |
| 16KiB_8KiB | 0.004125 | 0.000017 |
| 16KiB_16KiB | 0.004125 | 0.000015 |
Looks like the 16KiB d-cache was a lot more impactful on the overall miss rate than the 16KiB i-cache!
Running individual simulations
If we want to, we can also run individual simulations from a MultiSim configuration script. To do this, we just pass the configuration script directly to a gem5 executable without using -m gem5.utils.multisim.
To list all simulation IDs in a MultiSim configuration script, we can use:
gem5 {config_script} --list
For example, we can look at all of our simulation IDs by running:
gem5 multisim_experiment.py --list
When we do, we should see the following output:
process_8KiB_8KiB
process_8KiB_16KiB
process_16KiB_8KiB
process_16KiB_16KiB
Then, to execute a single simulation, we just pass gem5 the simulation ID:
gem5 {config} {id}
For example, if we wanted to only run the 8kB d-cache/8kB i-cache simulation, we can do so like this:
gem5 multisim_experiment.py process_8kB_8kB
And that’s it! You’re now ready to use MultiSim for your own simulations.
Benefits of MultiSim
As you (hopefully) saw from this brief example, setting up MultiSim is not too difficult! All of the multiprocessing details are handled by gem5, meaning that you don’t need to worry about knowing how to write and run scripts, and the chance that an error pops up somewhere is much lower. Additionally, these scripts are standardized and easy to share! If you want someone else to reproduce your results, you can simply send the script to them and they can run it. There are plans for continued support for MultiSim in gem5, too.
Overall, it’s recommended that you use MultiSim over scripts to run gem5 simulations in parallel. Hopefully this section convinced you of why!