Checkpointing
So… KVM fast-forwarding isn’t good enough for you. Good news! There is another option for accelerating simulation.
By the end of this section, you will be able to:
- Produce a simulation checkpoint.
- Modify a Simulation object to restore/resume from a checkpoint.
What’s checkpointing?
As the name suggests, a checkpoint in gem5 allows us to save the architectural state (and some of the microarchitectural state) of a simulated system so that we can restore it later and rerun the simulation.
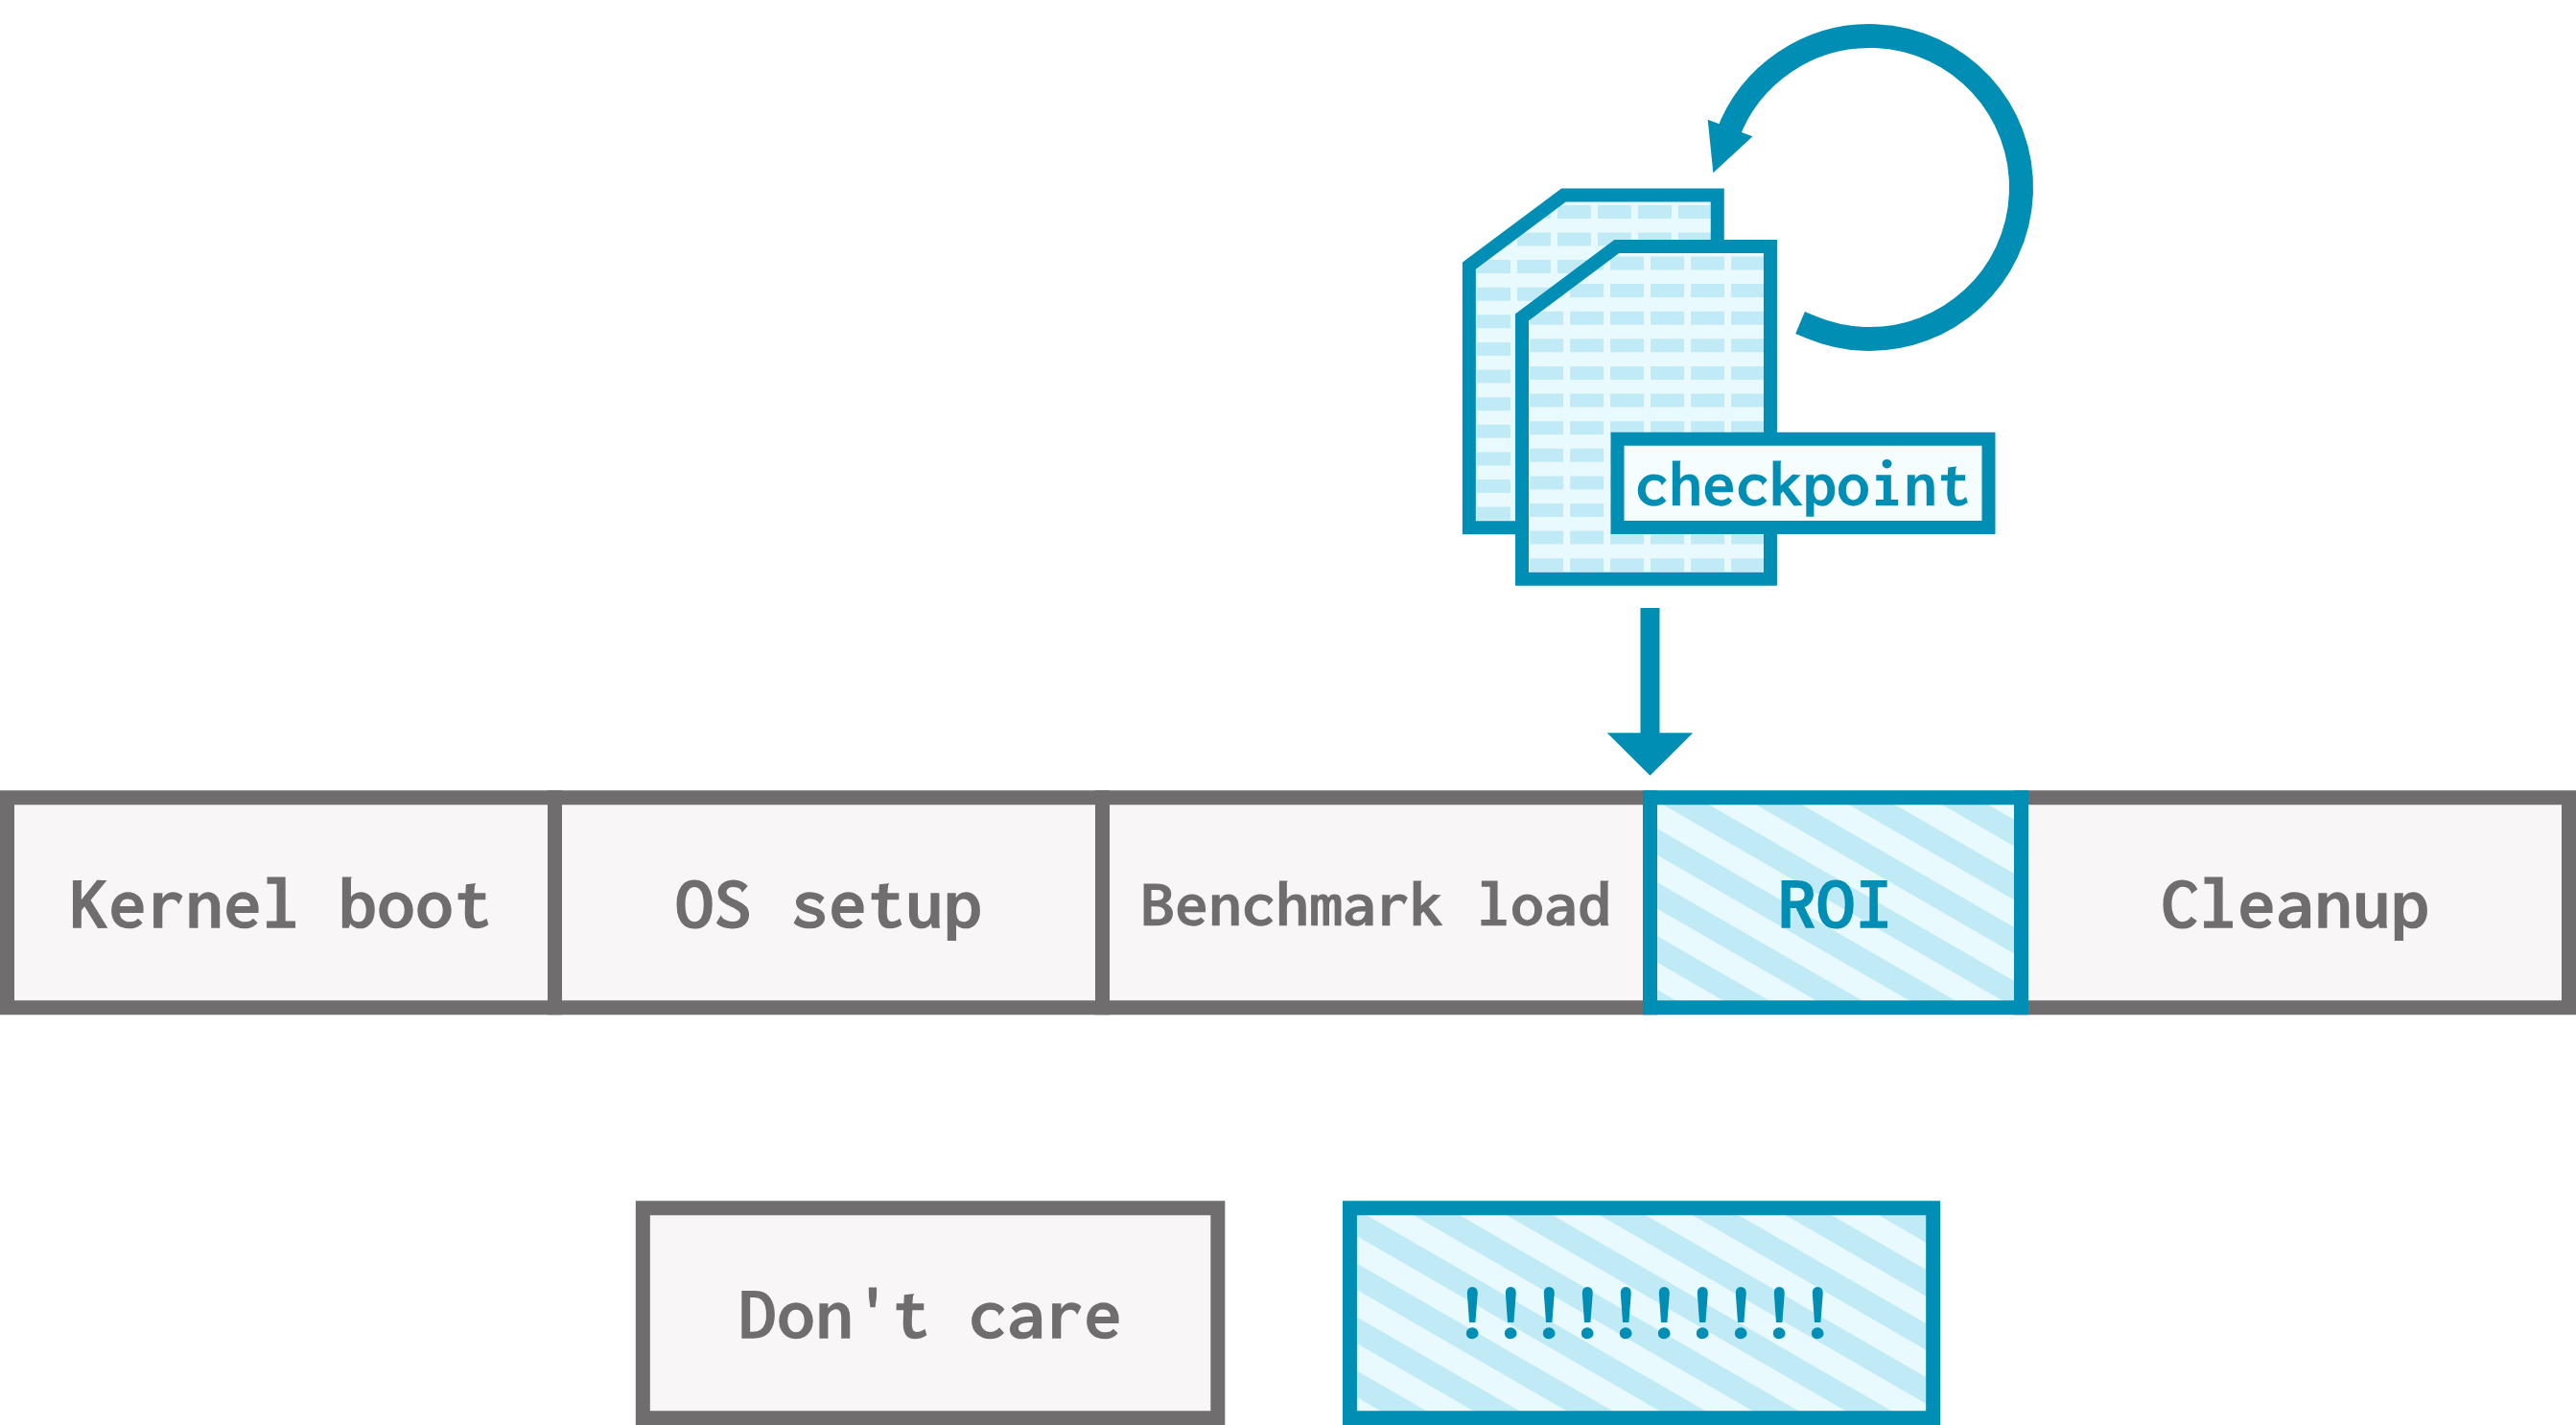
Checkpoints don’t have to be restored on the same system configuration they were generated from. After creating a checkpoint on a system configuration, as long as another system configuration has:
- The same number of cores,
- The same memory size,
- The same workload and dependencies (like the disk image),
the checkpoint can be restored on that system configuration, too!
Let’s do it
Let’s make and restore our own checkpoint! To use checkpointing, we need to do the following:
1) Create a system that will generate the checkpoint, 2) Indicate where in the workload our region of interest lies, 3) Save a checkpoint when we hit the ROI, 4) Restore the checkpoint we saved on subsequent runs.
Copy the checkpoint-and-restore directory from the bootcamp resources to get started.
The simplest possible system
We don’t need a highly performant or detailed system for checkpoint generation: once we take the checkpoint, we can restore it on the actual system we want to simulate and analyze.
Your turn: Fill in
TODO (1)intake_a_checkpoint.pyto set up a board with the following parameters:
- a
NoCachecache hierarchy,- a
SingleChannelDDR4_2400memory with a size of 3GiB,- a
SimpleProcessorwith a KVM CPU and the ISA that matches your host system.NOTE: You might need to add some new imports!
Answer
from gem5.components.cachehierarchies.classic.no_cache import NoCache
...
cache_hierarchy = NoCache()
from gem5.components.memory.single_channel import SingleChannelDDR4_2400 ... memory = SingleChannelDDR4_2400(size="3GiB")processor = SimpleProcessor( cpu_type=CPUTypes.KVM, isa=ISA.X86, # For example num_cores=2, )
Note that we should take care that this system has the same number of cores and the same memory size as they system we eventually want to analyze, otherwise our checkpoint won’t be valid.
Exit events for checkpointing
To set the checkpoint, we only need a workbegin event for the beginning of the ROI. However, we’ll discover later on that having a workend event for the end of the ROI will help us when we restore the checkpoint.
To take the checkpoint faster, we’ll use a KVM CPU to fast-forward to the beginning of the ROI. This means we are once again restricted to using address-mode m5ops for our workload annotations. If you choose not to fast-forward when creating checkpoints of your own, there’s no need to stick with address-mode m5ops.
Let’s use the same pre-annotated workload we did for our KVM fast-forwarding example (the Class A EP benchmark in the NPB benchmark suite).
We already did this last time, so this code is provided for you :)
Exit event handler
We need to customize our workbegin handler to take a checkpoint when we hit the ROI. It should do the following:
1) Save a checkpoint, 2) Exit the simulation.
The Simulator class has a function for saving checkpoints aptly named save_checkpoint(path). All you need to do is call save_checkpoint from your configuration script’s Simulator instance (we tend to call ours simulator) with the path to the directory where you want the checkpoint to be saved.
Your turn: Fill in
TODO (2)intake_a_checkpoint.pyto write aworkbeginhandler that does the following:
- Saves a checkpoint to a directory called
cpt.- Exits the simulation.
Checkpoint Saving Answer
You’ll want to use
simulator.save_checkpoint("cpt")to save a checkpoint!
Full Answer
def workbegin_handler():
    print("Done booting Linux")

    print("Take a checkpoint")
    simulator.save_checkpoint("03-cpt")

    yield True
Creating the checkpoint
It’s time to run this thing! Run the following in the command line:
gem5 -re --outdir=checkpointing-m5-out take_a_checkpoint.py
Once the simulation is complete, you should be able to find the checkpoint files in the cpt directory.
Aside: exploring the m5.cpt file
UNDER CONSTRUCTION!
Restoring the checkpoint
Let’s take the checkpoint we just created and restore it using a more detailed system and a timing CPU.
Time for a new file! Take a look at restore_checkpoint.py. This is a fairly simple configuration script that should look very similar to take_a_checkpoint.py. This time, however, we are using a PrivateL1CacheHierarchy, a DualChannelDDR4_2400 (notice that it, like the checkpoint-generating system, is of size 3GiB), and a timing CPU (note that this one also has 2 cores).
We restore our checkpoint by passing in a checkpoint_path as a parameter to the Simulator instance. This should be the full absolute path to the checkpoint folder, in our case cpt.
Your turn: Fill in
TODO (3)inrestore_checkpoint.pyto pass in the path to our generated checkpoint.Answer
checkpoint_path = "bootamp/resources/03-checkpoint-and-restore/cpt"
Running from the restored checkpoint
Let’s run!
gem5 -re --outdir=restore-m5-out restore_checkpoint.py
You’ll notice that we told the simulator to run for 1,000,000,000 ticks then exit:
simulator.run(1_000_000_000)
In a proper simulation, we would probably want to add a workend handler at the end of the ROI so that we can exit once the ROI ends. If we do this, we can use simulator.run() with no parameters.
When we restore a system state from a checkpoint, it’s important to remember that all of the microarchitectural elements will be cold (empty caches, etc.). This may have an effect on early system performance.
And that’s that! You’re now ready to use checkpoints in your code.
One-upping KVM fast-forwarding
We discussed some issues with KVM fast-forwarding in the previous section; let’s see how checkpointing resolves them.
The simulation system DOESN’T need to have the same ISA as the host
By restoring a simulation from a checkpoint as our acceleration method, we remove the need to use a KVM CPU on restored runs. This means that we are free to use whatever ISA we like on those runs, as the KVM CPU was what was locking us into matching ISAs with the host.
KVM might impact parallelism, but checkpointing doesn’t
Similarly, the impact on parallelism was due to the KVM CPU’s use of the hardware KVM thread. If we aren’t using KVM CPUs anymore, there won’t be any parallelism issues!
We’re NOT still executing the boring parts
With checkpointing, we only need to sit through the boring part once, during the simulation run that generates the checkpoint. After that, we can run future simulations by restoring from the checkpoint, no boring parts required.
Non-Deterministic
Since checkpoints restore from a known state, the ROI will always execute from a single deterministic system state.
While checkpointing has advantages over KVM fast-forwarding, that doesn’t mean that KVM fast-forwarding is useless or obsolete.
For example, you might want to use KVM fast-forwarding if you want to test out a different number of cores, a different workload, or a different memory size. We utilized KVM fast-forwarding to help our checkpointing process in this example!
Remember: use the right tool for the job!